February Dev

The sounds none thinks about. Weekly blog post

Hello peps.
Another week another blogg post.
This week I’ve been focusing entirely on sound. Sound Effects which I’ve been struggling with a lot. So this week I had enough with programs that did’t want to work with me and started using FL Studio. The program is created for house music mainly but it has been working fine for me in creating sound effects. At the same time I got to borrow a extern music card, headphones and mic from a buddy of mine. This supported me greatly in recording sound effects for the game like a bubble sound that plays when the avatar dashes.

Screenshot 2014-03-20 22.52.32
In the sound making as itself it was a jungle, for a person like me who’ve only dealt with pre-recorded sound effects and voice recording. About half way through the sound effects I feel like I have no idea in what I am doing, clearly I should learn an instrument to be able to understand tones and notes. But this far I’ve been able to create what I’ve had in mind, and I hope my sound effects will be able to help convey what we want to tell the player with the game.
One particular sound effect that I am particular proud with is the bubble noice. It took me about a 4-5 hours to create the sound that I was happy with and how I created the sound was by recording myself blowing bubbles into milk. I tried several different beverages to gain the perfect sound for the bubbles. I think I started out with normal water then went over to water including soap. I also tried using soda but it wasn’t working out as properly as I intended.

I Think the milk was thick enough for the bubbles to give me the correct sound. The fat in the milk is what helped me out in the end. I wonder if making real bubbles with soap and recording them when they pop. One thing that would really have helped me with the sound engineering was to find a forum where the recording and creating of sound effects was discussed. The most forums I have found have been community forums to large free sound fx databases.
Next week is all post mortem that’s going to be focused. I don’t want to repeat what happened last time when I was too late to turn in the post mortem because of internet failure. Wish me luck!

Over and out Adam

Weekly post. Sound Design


Screenshot 2014-03-13 23.01.56

Hello world.

This week I’ve focusing on creating sound and fine tuning the last on the design document. The sound for this week have been growling sound that indicates that the character is low on hunger, showing that the avatar is close to death. The idea is to start playing the sound at 50% hunger at really low volume, then increase the volume as the players hunger is decreasing. As well as that I am working on a way to make the growling noise go faster as the hunger is increasing.

Other sounds I’ve been working on is the power up sound and growing sound. The growing sound is trying to be something instyle with the growing sound from pokemon. I don’t want to use the sound but I want it to be in style of it. I have been using an website for creating the power up sound as well as the growing sound without any bigger progress. Can be that I should try to get a programme in style of 8bit sounds. Going to look further into it during the evening.

The point of the growing sound is that it’s going to be a three part sound where the note gets lighter and louder, to indicate that the avatar have been empowered. The hard part is that I don’t want the sound to sound too much bit, I want the sound to feel believable and keep the same standard as the rest of the game. If the game isn’t made in Bit inspired graphic the sound will feel misplaced. The challenge is to find what sound creates the illusion of the sound I want to create. Maybe I am lack the knowledge to create the sound for this particular cause. The only thing I really can do is to continue to try and find the sound I am after. In the end it’ll work out.

Meanwhile I’ve been trying to work out the MDA for the game.  During the afternoon today I worked with the MDA in the design document. Trying to find what empowers what troughout the game and what is really important. Looking back at the important part is giving me a feeling that our attention has been a bit misplaced. Maybe that is an experience I can carry with me too the next project.
Speaking off, now that the project is going towards an end, the feeling of these two past weeks have been tiered, that people are looking towards the final project this year and don’t really care what happens now.

Well, with one last push I am sure that we’ll make it.

Over and Out
Adam

P.S. The SGA Report is comming up with picture and “post mortem”
Stay classy 😀

Level design and Experience

Hello Minions

This week I’ve been focusing on the design for the game, that includes design document, level design and experience curve.
I want to start talking a bit about the experience curve and numbers. There have been a lot of numbers, and then I mean a lot. Experience curve is something that the player will never notice if it’s done properly, done wrong and the game will do a lot of damage.

So, with no experience (game design wise) about curves and progression with game design, I set out to construct a table to inform how much experience is needed to progress the avatar to the next size.
in the games both the avatar and the fishes have 9 different levels to achive, 0 – 8 for the enemies and 1-9 for the avatar. This is so the avatar has something to eat when starting the game.
At writing moment I’ve choose to take a sequence with an increasing level that makes sense, the so called Fibonacci sequence.

With the Fibonacci sequence it feels like a natural rising order. I studied the leveling curve of the wow but it changes a lot trough out the leveling, one to ten is a simple second grade function, but remaining levels uses more complicated functions, I ended up with Fibonacci’s curve for the experience and  for the gained experience per enemies, I choose numbers that fit in-between for the scope. (Subject to change)

I have a fear that the curve will be too big for the game itself, making it too long between the levels. Meaning that the player will find a grind in-between level, but making the gap to narrow in-between will make the player bored, no challenge. The line will have to get tested during the coming week. Now my focus is to get it implemented and to get the core loop into the game.

Image

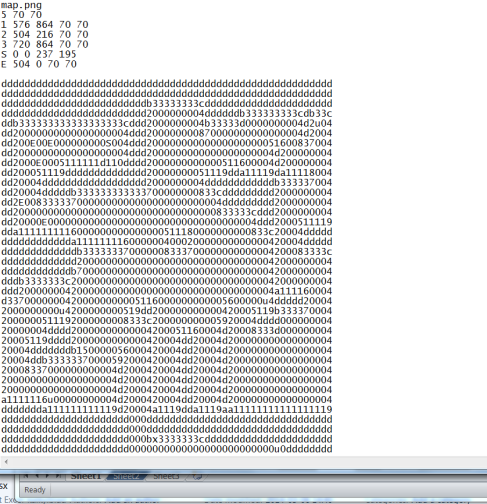
I want to take a small bit and mention the level design. As it is right now I’m making three different stages that seamlessly fit together, the first level is formed like an open world with a few cave systems where you can find a entrance to the second level, and some without a precise purpose, just deformations.
For the second level I’ve gone with a large cave system that branches out. I did a lot of reading for the level design. I am still unsure on how the third and last level is going to work. Either it’ll be really open as the first level or it’ll be a larger cave system. I’d appreciate any feedback good or bad.
I WANT TO IMPROVE.

Over and out

Adam

Game Dev Feb. Texture makin

Hello guys

This week I’ve been focusing on making a tile that can be used as a ground layer on any level of the game. The idea with the tile is to make it connect with itself in any direction.
SpriteCoral128
The making of the Stone tile works like you create a few lesser pebbles with reasonable detailed, for this tile I aimed to create something in our aimed art style. One thing that could be done to the existing picture is to simplify the in the values to obtain the want feeling. The important thing when using this technique is to make the small pebbles really easy, the pebble shall not draw to much attention in itself.

Anyhow, with the small pebbles made I started duplicating them and turning each so they won’t feel repeated.

With the canvas filled with pebble I used to offset function to check how the texture worked out, editing it so it could connect with itself in any direction.

This technique is great way to make textures that wants a feeling of being a more cartoon and simple art style. Then it’s a matter of how detailed the first part is. If it stands out to much it’ll draw attention and then it’ll easy give out how it was made. Made right this technique is really valuable to make great textures.

Rocks

I am certain that it can be used for other things as well as making pebbles, I’ve learned the technique from a hand painted grass texture tutorial. I’ll post the link down below.

This tile was originally set out to be the underwater mountain rock but looking at it makes it more suitable for corals or lesser rocks. I’ve been trying to find a reliable way to make a solid rock that can be repeated and fits into the world that we’re making.

I am happy how the Rock tile ended upp when it was done, what needs to be done now is to make a couple of tiles that shall be used as corners for the first tile. Making them means that the edges of each tile needs to be transparent so it can fit into the game world without any sharp edges.

For the next week I’ll be focusing on sound and design, I have been talking with people on the school and will be given accses to a sound room, giving me time to make all the sound for the game. The design part will be most focused on the design document and level design.

Over and out
Adam

Oh yeah. The link:

I hope it’ll help you out.